


How to Build a Window Seat...


.png )
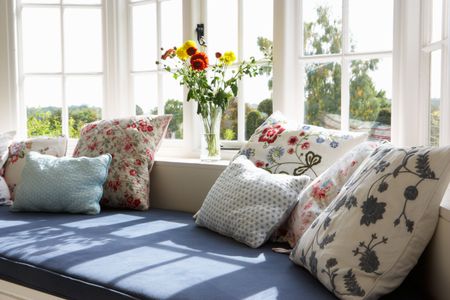 Window seats aren’t just pretty–they can be practical too! This simple addition to your room is a wonderful way to add extra seating to smaller spaces, offer hidden storage, and provide a quiet place to read, relax, and enjoy the view.
Whether you want to create a cozy corner or a more sophisticated design element to the room, a window seat can offer just the right touch to an otherwise boring space. The following instructions can be used for everything from the most basic window seat to a high-end style, designed to set the tone of the room.
Window seats aren’t just pretty–they can be practical too! This simple addition to your room is a wonderful way to add extra seating to smaller spaces, offer hidden storage, and provide a quiet place to read, relax, and enjoy the view.
Whether you want to create a cozy corner or a more sophisticated design element to the room, a window seat can offer just the right touch to an otherwise boring space. The following instructions can be used for everything from the most basic window seat to a high-end style, designed to set the tone of the room.
Choosing the Right Spot
If you have decided that it’s time to add a window seat to your home, your first step is deciding where to put it. Is there a specific room or window you have in mind? While smaller seats can be placed at any window, for a more luxurious look and comfier feel, you may want to consider putting one under a larger bay-style window that overlooks a picturesque setting. What if your home doesn’t have this feature? Having a bay window installed will cost around $2,300, according to HomeAdvisor data. Here are some tips when choosing a spot for your window seat:- Keep away from high traffic areas – this should be a place to escape to, so place it somewhere quiet and peaceful.
- Pick a beautiful view – not only will this enhance the natural look of the room, but will make your new seat more enjoyable.
- Avoid HVAC vents – often heating and cooling vents are located under windows. These can be costly to relocate; plus, it can make the job more complicated. Avoid when possible.
Choosing Your Style
Once you have figured out where you want to install your new window seat, you need to figure out what size and style you want. Measure the window. How much space do you have to work with? What about the rest of the room? Consider whether this large seat flanked with bookcases would enhance the interior, or make it seem more crowded? Once you know how large (or small) to make your seat, it’s time to figure out how you want to build it.Build a Seat
A small basic window seat is good for single windows tucked in foyers, at the top of the stairs, etc. Simple to build, basic window seats take a day or two to build and cost a few hundred dollars. Begin by framing the bench box to match the dimensions of your seating area. Next, measure, cut, and attach plywood sides. Measure and cut a plywood top (add hinges if you would like to add some extra storage). Paint and install. Add a cushion for a comfier feel. The trick to making this DIY project as easy as possible: using pre-made kitchen cabinets and standard shelving units to create an elegant window seat for a fraction of the cost of having one custom made. Depending on the style and materials used, these types of cabinets can run as low as $100 or as high as several thousand. This opens your options when designing a unique custom look. How can you use these cabinets and shelves to create your one-of-a-kind window seat? Here’s how: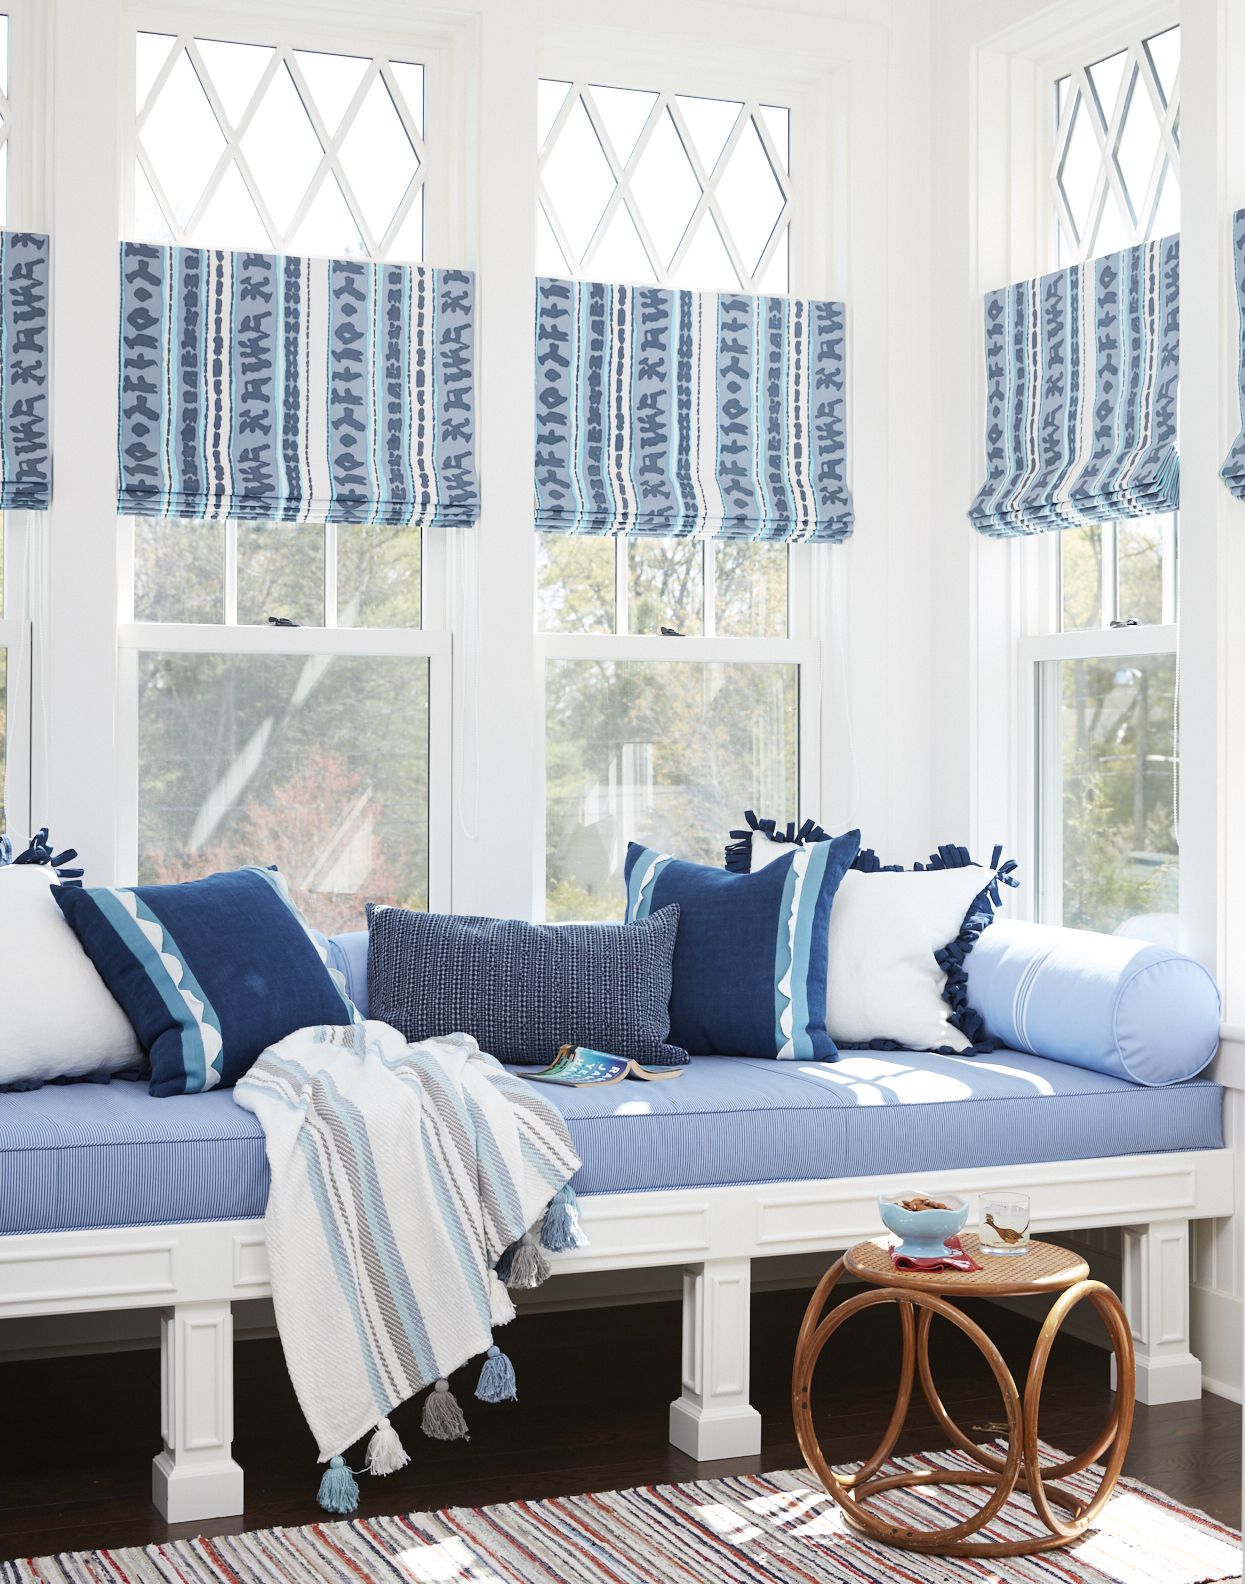
- Begin by building a frame for your seat using 2x4s or 2x6s, making sure that they are the height of the existing baseboard, and that your frame is the same depth of your cabinets (not including the doors). Once the frame is levelled, screw into the wall and floor.
- Place two of the refrigerator cabinets onto the frame (centring under the window). Clamp together: frames flush. Feel free to use any style cabinets you want. Buying more expensive wood grained cabinets will make your job easier since you won’t have to paint or finish them, but can cost more than $1,000 for materials and installation. Unfinished options are cheaper but will need you to paint or stain them.
- Fasten the cabinets together with 2 1/2 inch drywall screws. Be sure to drill deep enough so that the screw heads are flush with the surface.
- Place 12x24x30 inch wide cabinets to each end of the seat cabinets. Clamp and screw these end cabinets to the seat.
- Make sure these cabinets are level. Then screw them to the wall joists for safety.
- Fasten six 3-1/2-inch 2x2 blocks to the top of each cabinet. This will help raise the height for the next step.
- Fasten a 15-inch intermediate cabinet on top of the blocks on each end cabinet. Level and fasten to the wall.
- Add your bookcases. Simply screw to the cabinet base first, then, once level, screw into the wall.
- Conceal the joints by adding prefinished mouldings and accessories to the sides and front. Top off with a beautiful crown molding at the top finishing the job with baseboard moulding to hide the frame.
Add Those Special Touches
Finish by painting or staining unfinished wood; adding decorative hardwood and placing a cushion on the seat. For a more sophisticated look and comfier feel, consider having the seat professionally upholstered, which runs around $600. Now, step back and enjoy the rich look of an intimate window seat, complete with side cupboards and bookshelves.Other Articles

-828311_550x300.jpg)

-827312_550x300.jpg)

-825993_550x300.jpg)


Featured News


News 1st, MTV Channel (Pvt) Ltd, MBC Networks (Pvt) Ltd, 45/3, Braybrooke Street, Colombo-02.
T.P : +94 114 792 700,
Fax : +94 114 792 733
T.P : +94 114 792 700,
Fax : +94 114 792 733


 |  |  |
|---|---|---|
 |  |  |
 |  |  |
 |

.gif)